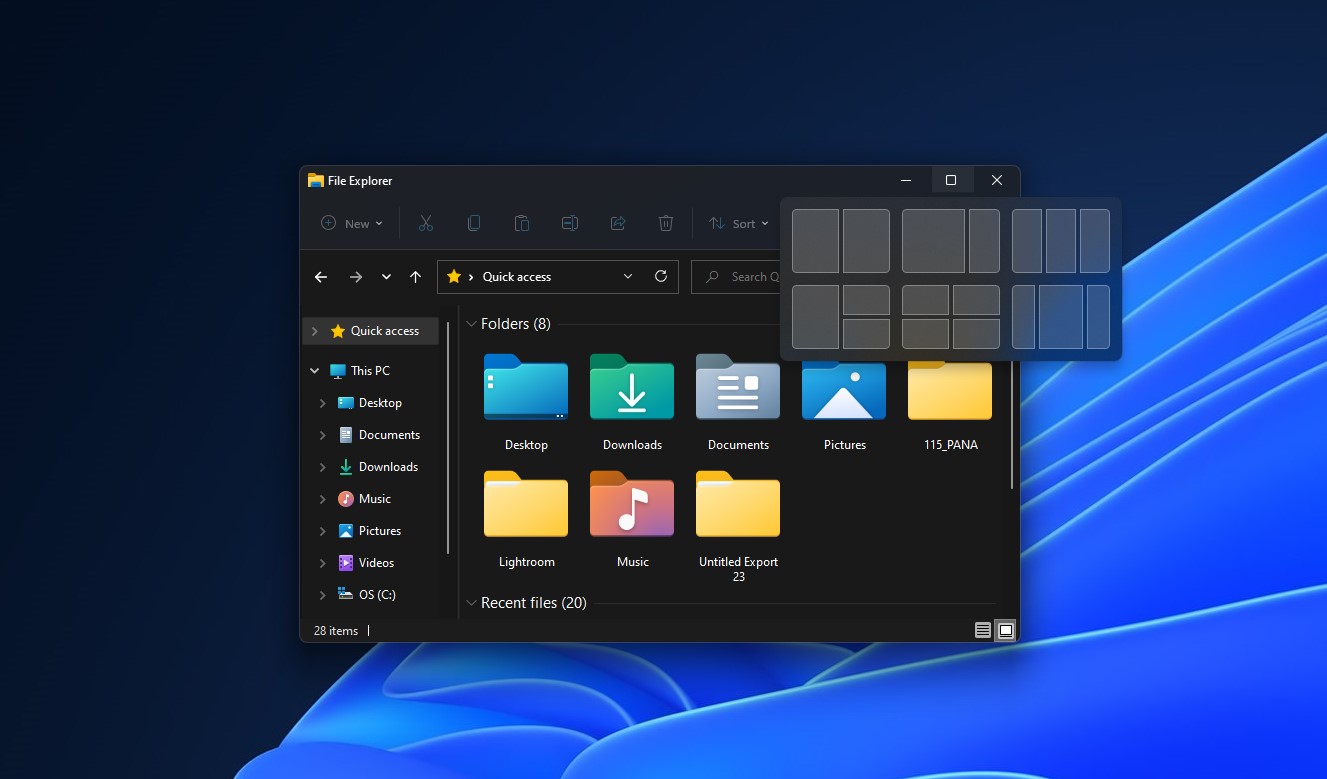
Palash Volvoikar / Android Authority
Windows has had window snapping for a while now, but Windows 11 takes it one step further. Windows 11 introduced Snap Layouts — a simplified version of the drag-to-snap window snapping and arrangement system in Windows. It’s a nice way to arrange your windows in the new update. Here’s how to use Snap Layouts in Windows 11 to make your multitasking experience even smoother.
Read more: How to install Windows 11
QUICK ANSWER
To use Snap Layouts in Windows, press Windows Key + Z, or hover your mouse cursor over the Maximize/Restore button of Window. Select the layout you want from the pop-up, and select Windows according to the position to arrange them.
JUMP TO KEY SECTIONS
How to use Snap Layouts in Windows 11
Snap Layouts are enabled by default in Windows 11. Here’s how you can get started with the feature.
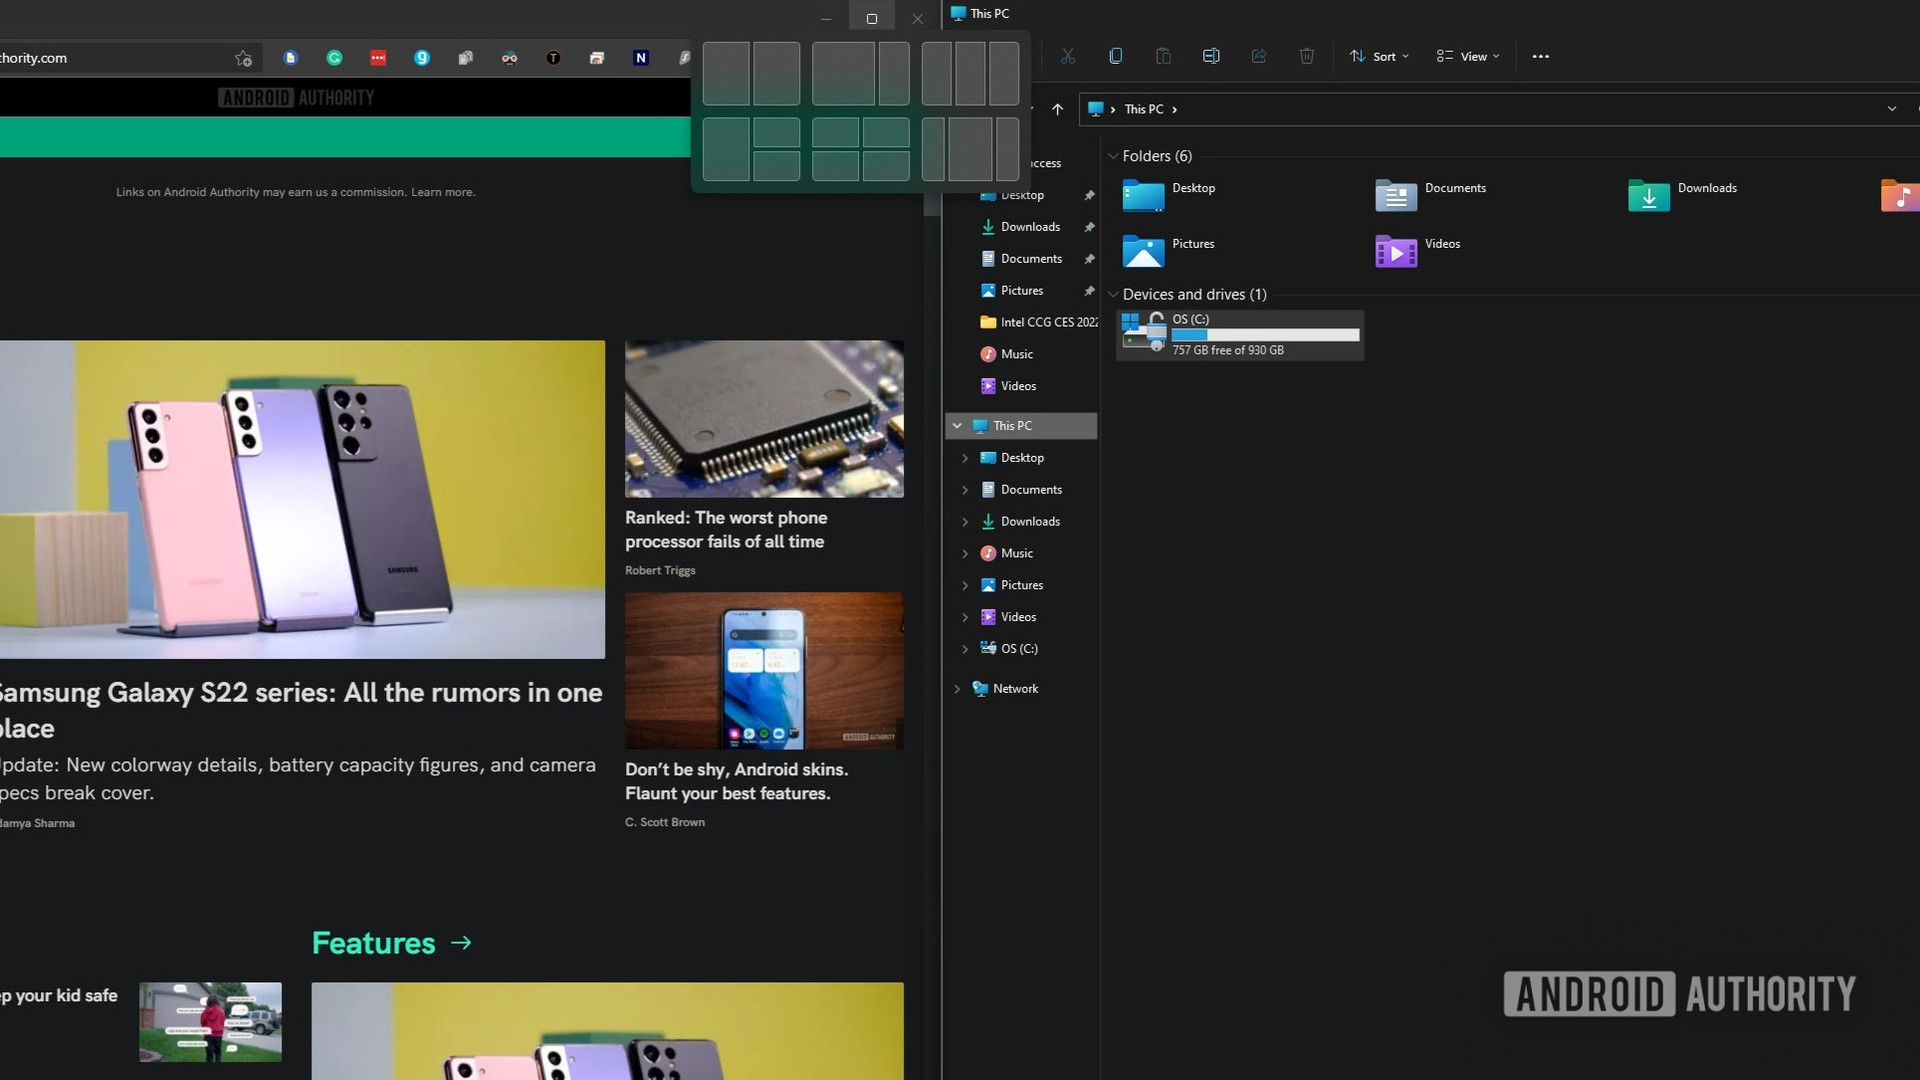
- Press Windows Key + Z to summon the Snap Layouts pop-up, or hover your mouse cursor over the Maximize/Restore button of a window.
Palash Volvoikar / Android Authority
- The Snap Layouts pop-up will show you six layouts you can choose from — two two-window presets, three three-window presets, and one four-window preset.
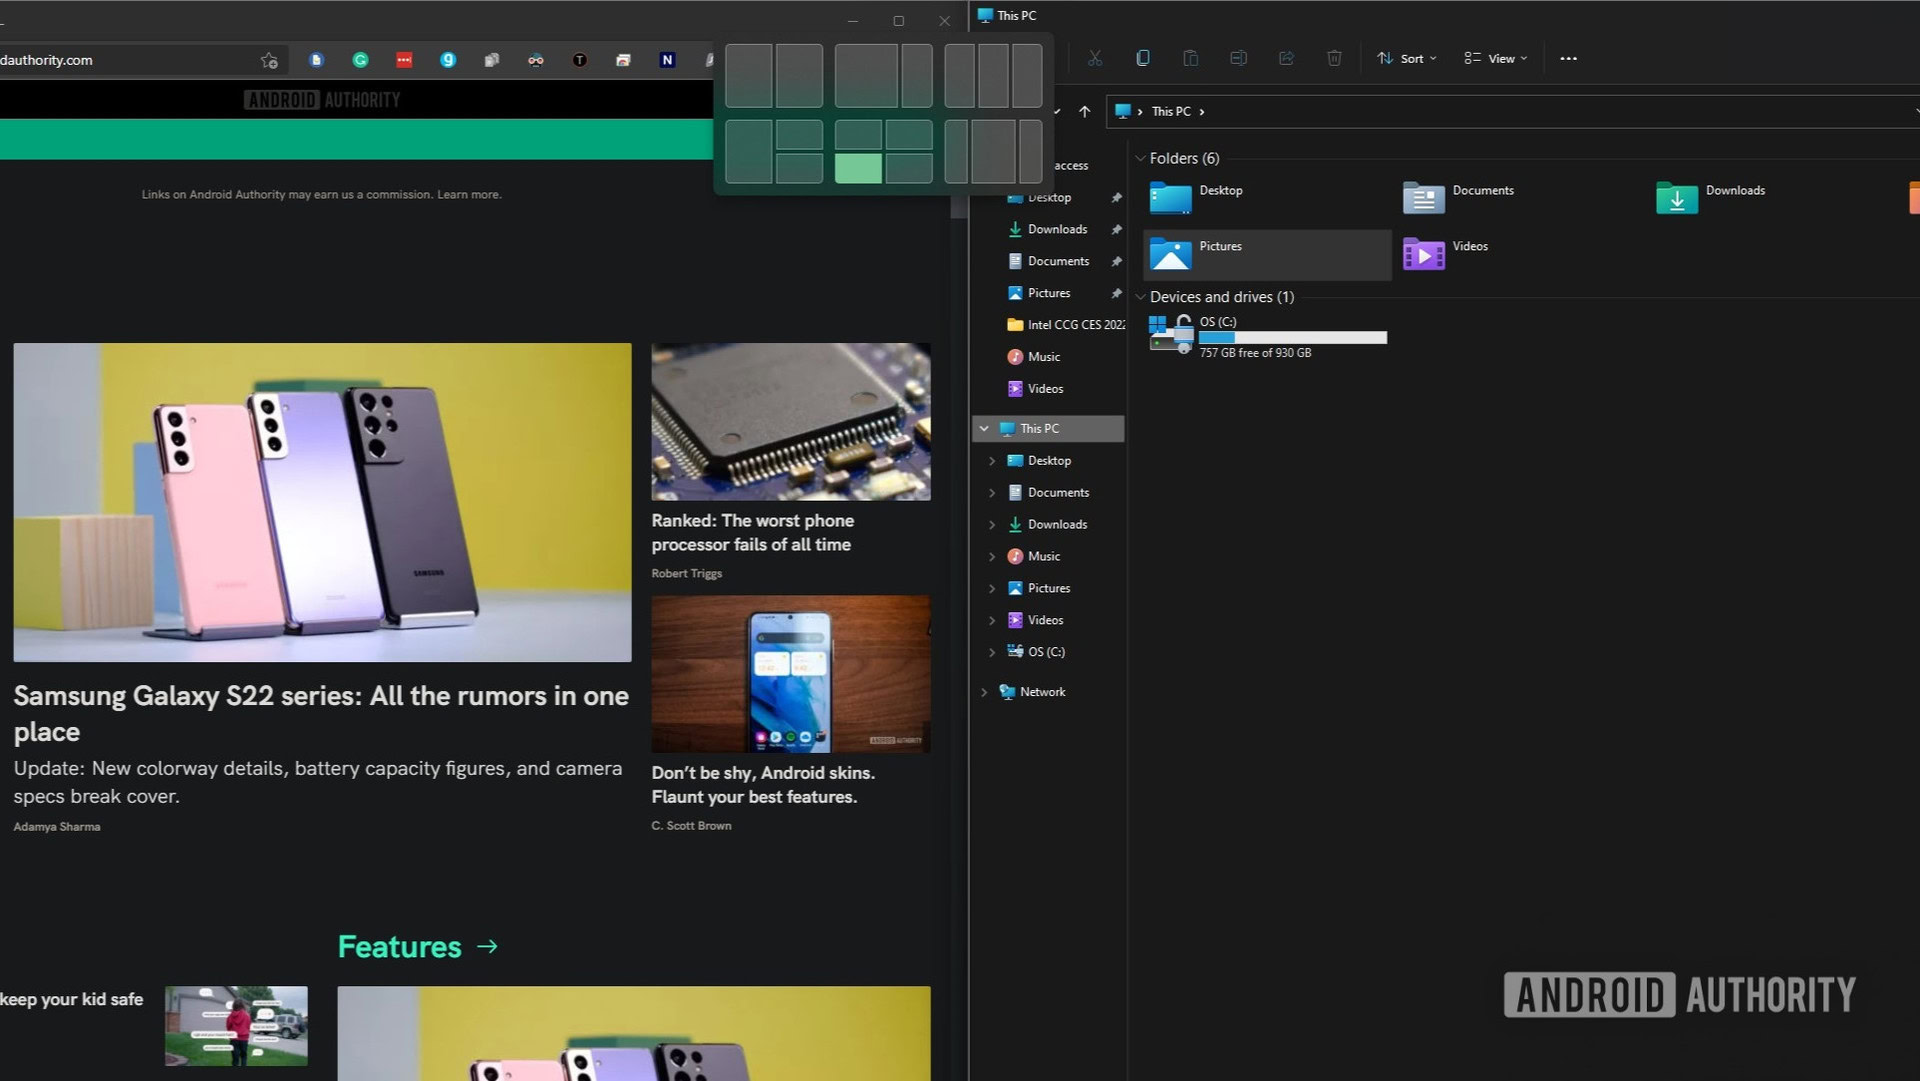
- Depending upon how many windows you want to stack, and in what manner, you can select your layout. Hover over the position you want your current window to take, and click on it.
Palash Volvoikar / Android Authority
- Once you click on it, the currently active window will snap to your chosen position.
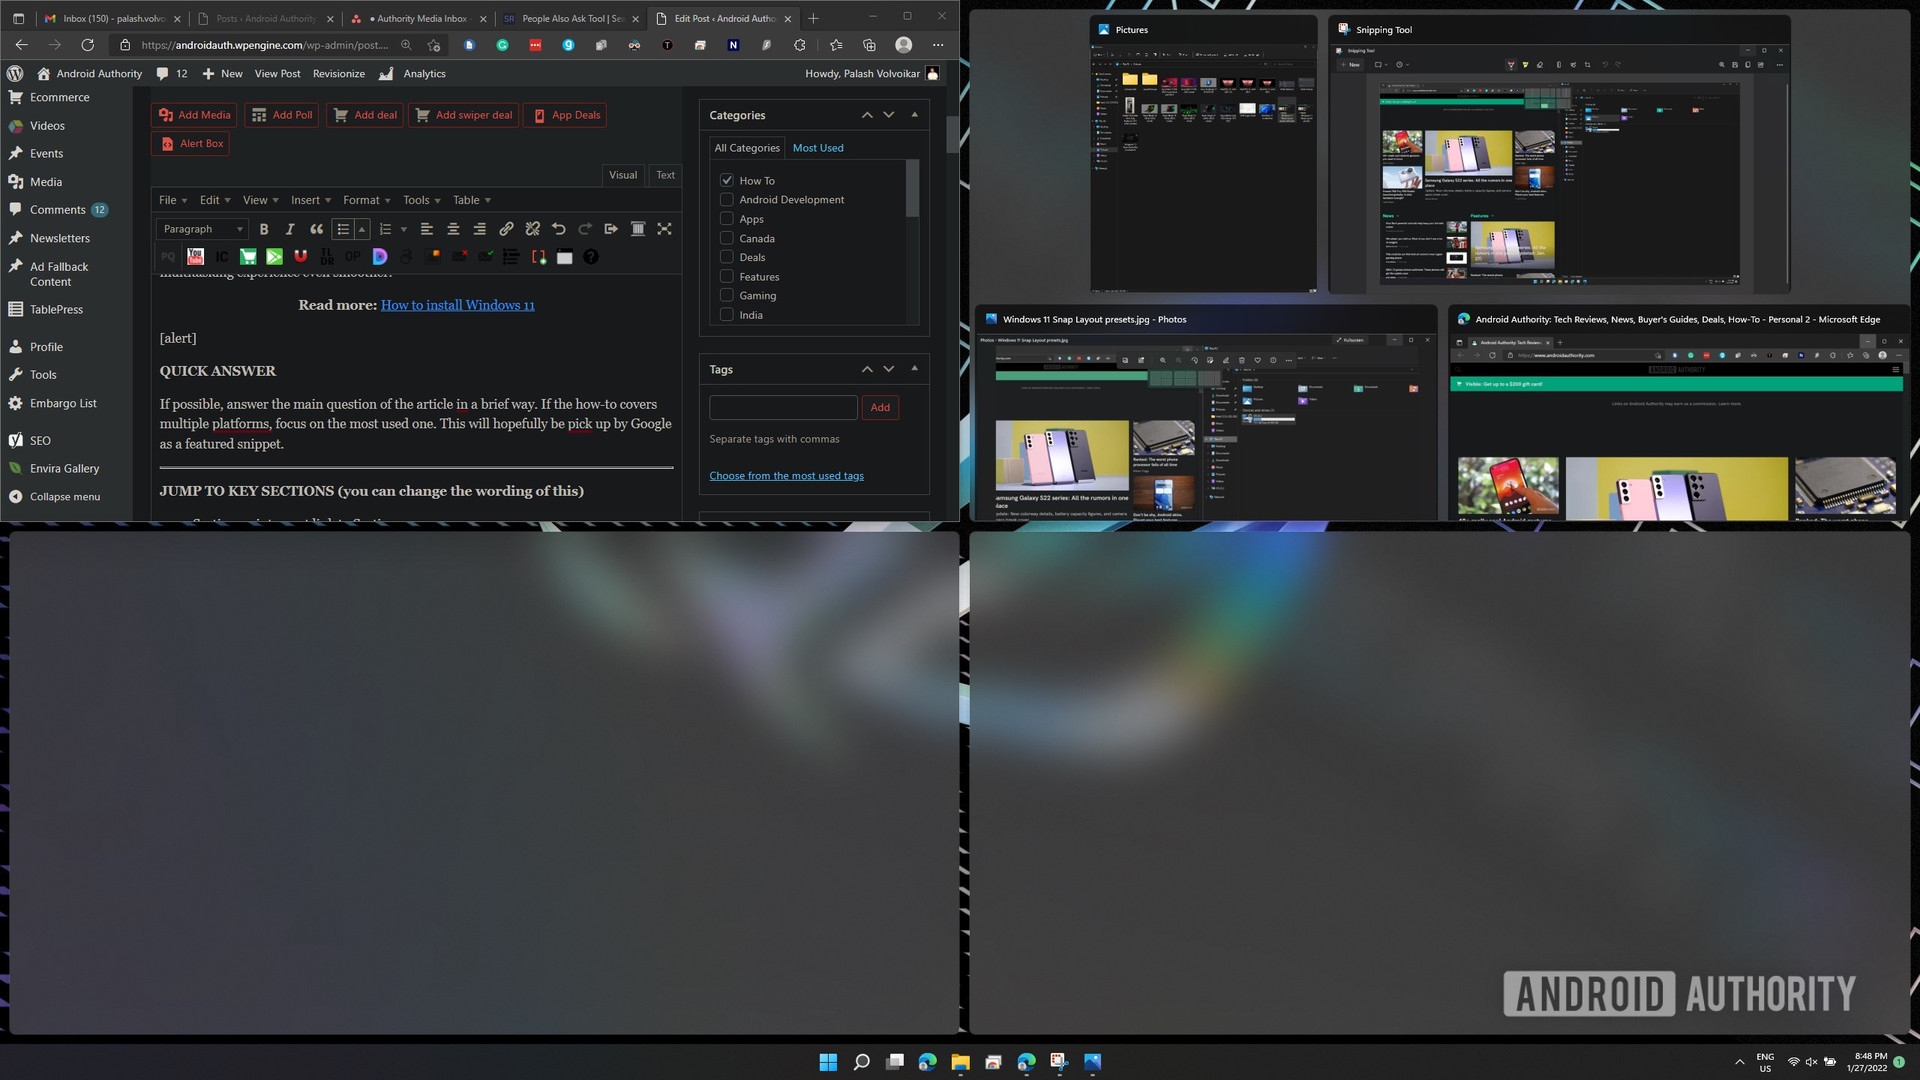
- You will then get the option to assign positions to the rest of your windows, turn by turn. Window thumbnails will hover in the unassigned zones, letting you pick which window you want in that particular position.
Palash Volvoikar / Android Authority
- Click on the required window as per the position you need.
That’s it. If you want to change anything or find any windows, you can use the Alt + Tab shortcut, or check the now-formed window “group” in the taskbar.
Turn off Snap Layouts
Palash Volvoikar / Android Authority
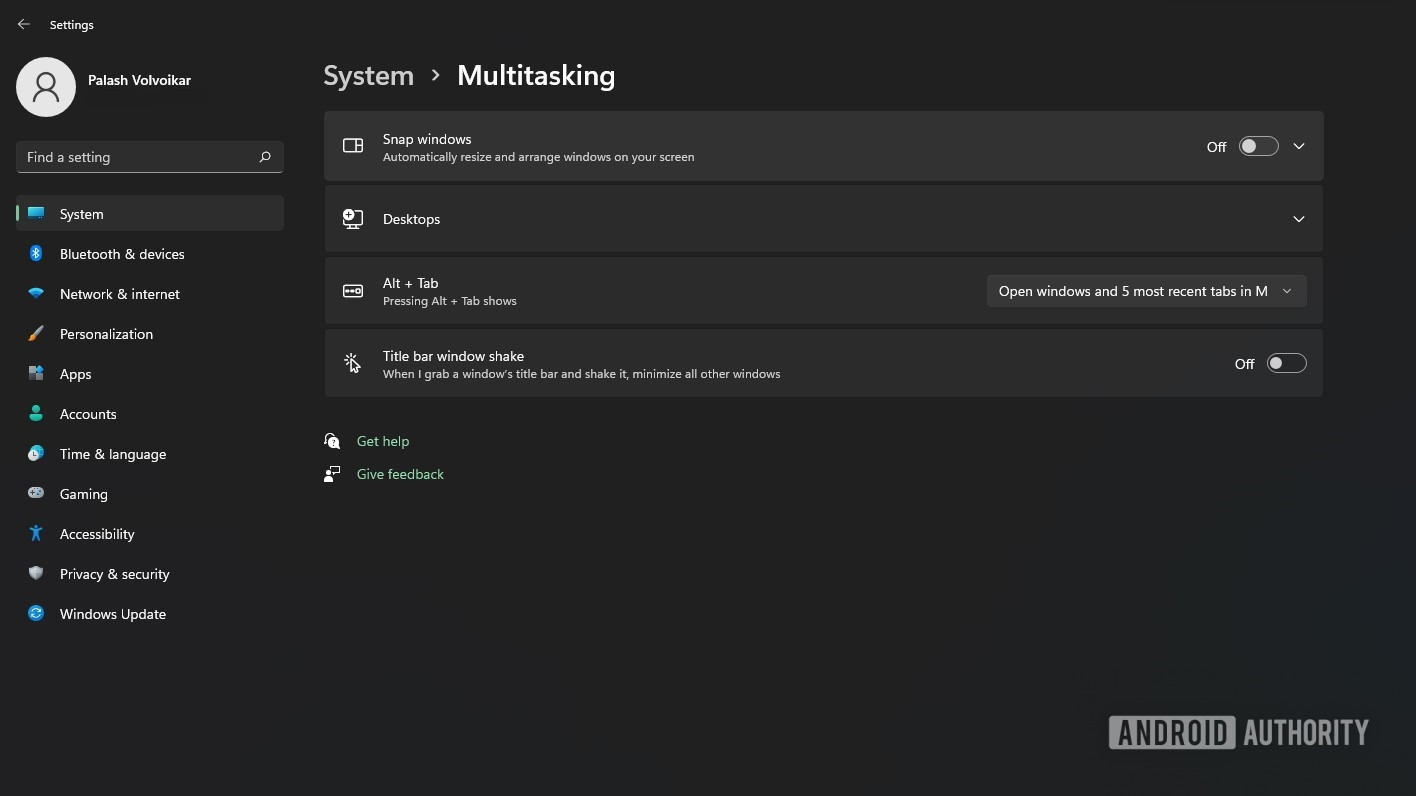
If you want to turn off Snap Layouts entirely, there’s a way to do it in the settings.
- Head over to Windows Settings -> System -> Multitasking.
- At the end of the Snap windows tab, click on the toggle, which should say On by default.
- Window Snap Layouts will now be turned off until you turn them back on.
Change Windows 11 Snap Layouts settings
Palash Volvoikar / Android Authority
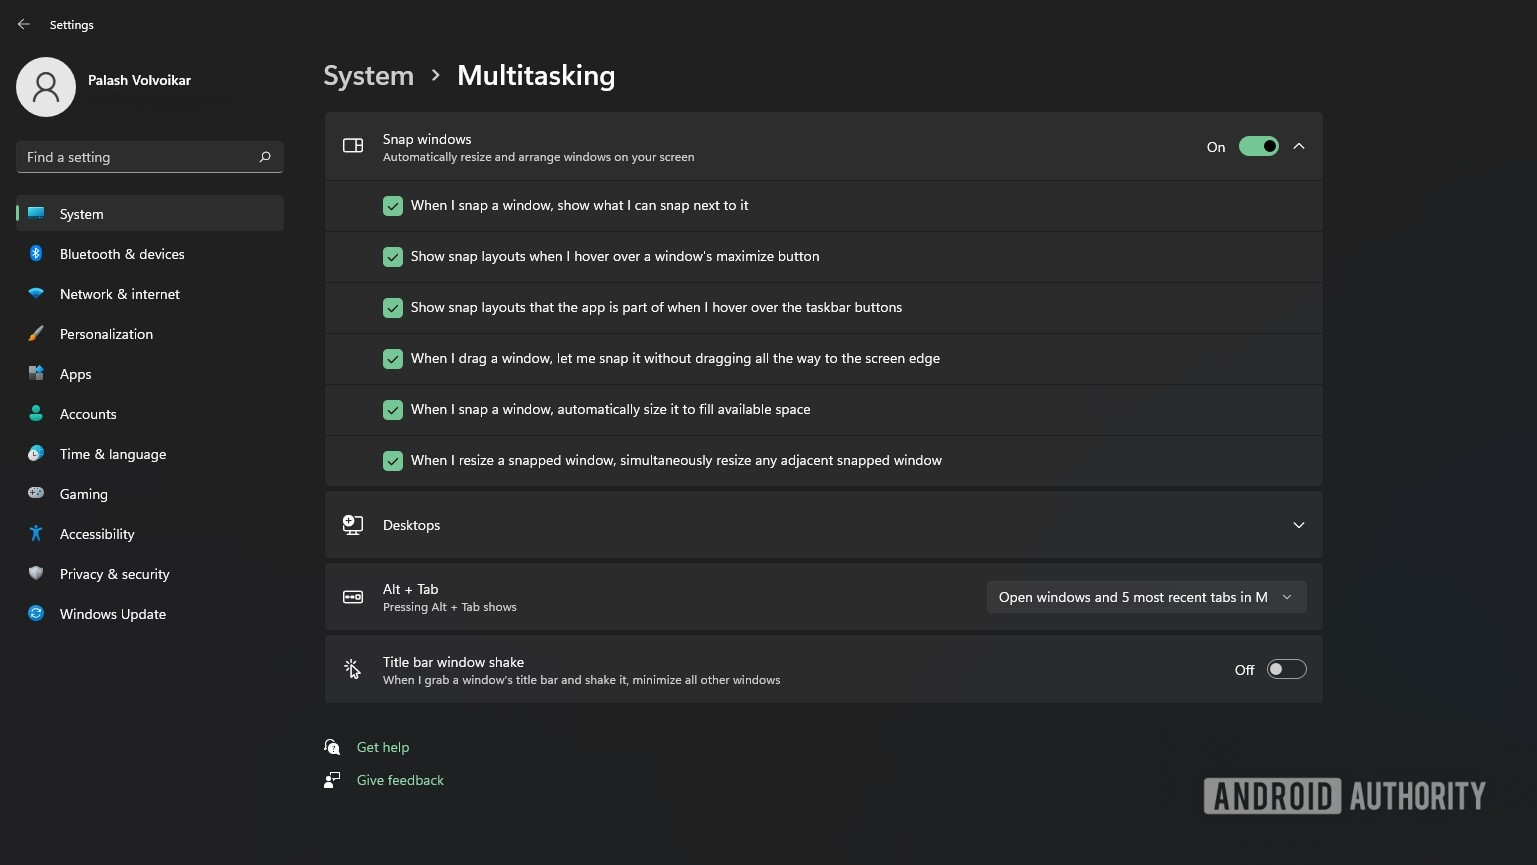
You can fine-tune your Snap Layout experience in the settings.
- Head over to Windows Settings -> System -> Multitasking.
- Click on the arrow at the end of the Snap windows tab to expand the options.
- Check/uncheck the settings you want to use/not use.
Read more: What you need to know before upgrading to Windows 11
FAQs
How do I turn off Snap Layout?
You can turn off Snap Layouts in Windows settings, under Multitasking. Follow the steps mentioned above to do so.
How do I get Snap Layout on Windows 11?
Snap Layouts are enabled by default in Windows 11, and you can get them by clicking Windows Key + Z.
How do I change the Snap Layout in Windows 11?
You can click Windows key + Z or hover over the Maximize/Restore button to change the Snap Layouts, or head to the settings if you want to fine-tune the experience.


