Windows is pretty good with hard disk file systems. While you may think that you’re stuck with the same partitions and format your hard disk came with, Windows will let you change things up as per your preference. It’s not too complicated, either. Here’s how to format and partition an external hard drive on Windows.
Read more: How to change the drive letter in Windows
QUICK ANSWER
To format an external hard drive on Windows, find it in Windows Explorer, right-click it, click Format, and follow the steps. To partition an external hard drive on Windows, open the Disk Management tool, right-click the external partition and click Shrink Volume. Follow the steps to shrink it by as much as you need the new partition to be, then right-click the Unallocated space and click New Simple Volume, and follow the steps.
JUMP TO KEY SECTIONS
How to format an external hard drive on Windows
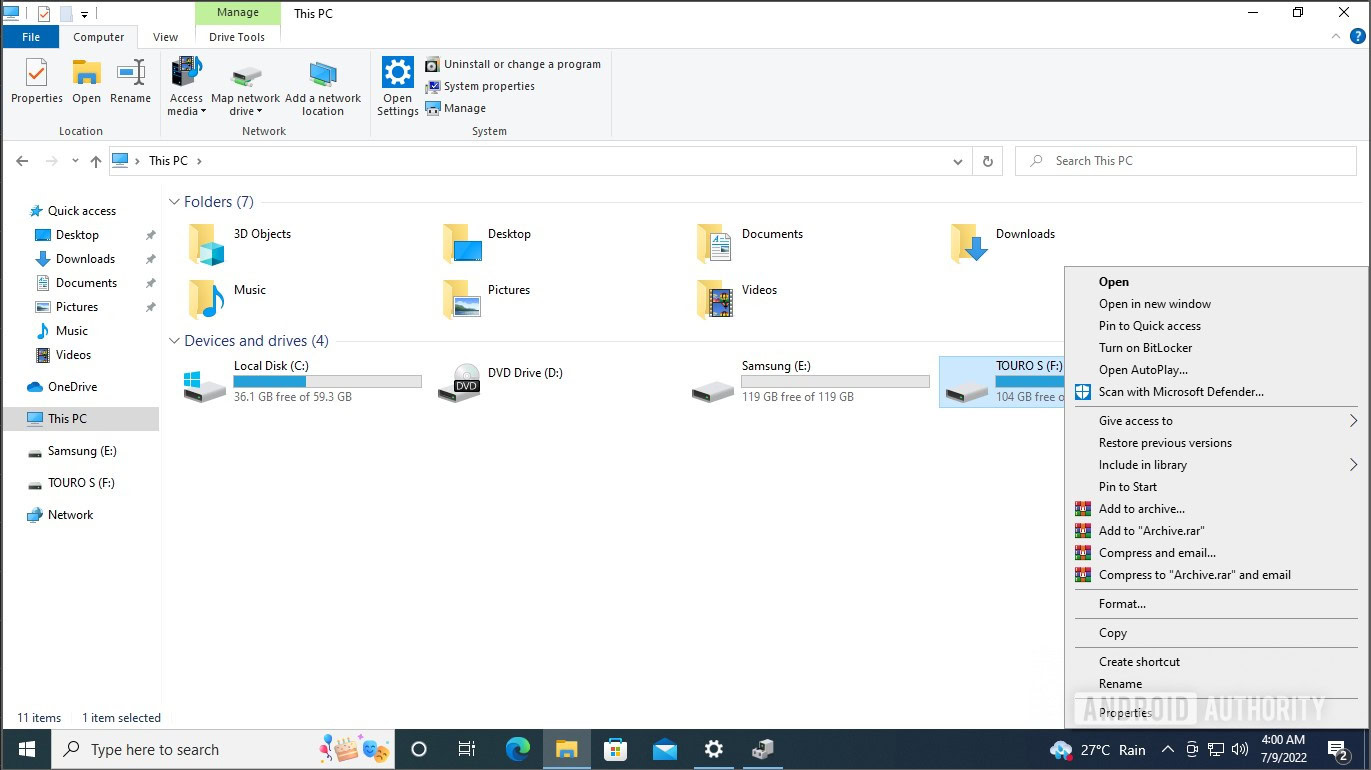
Formatting an external hard drive on Windows is quite simple. Connect the external drive to your PC and open Windows Explorer. Click This PC from the left navigation pane to show all the available drives. Right-click the external drive, and click Format.
Palash Volvoikar / Android Authority
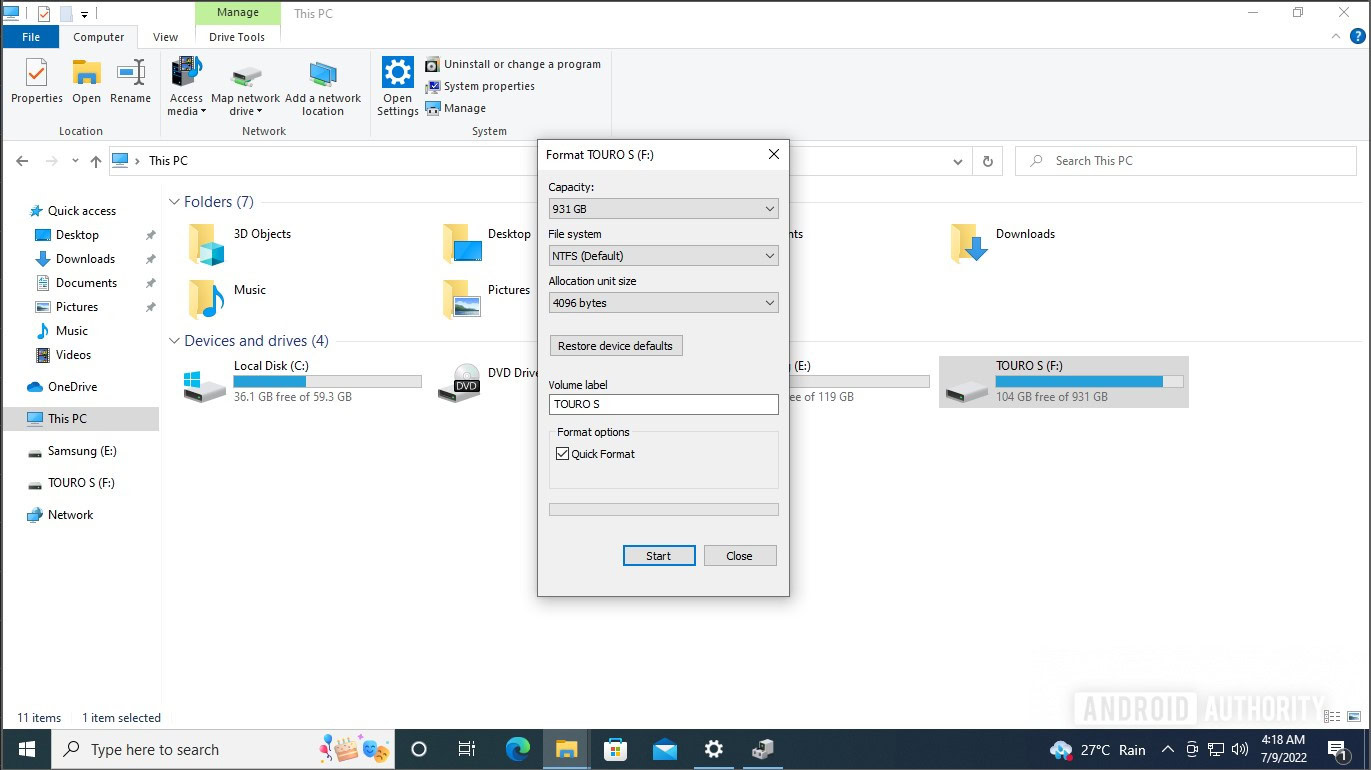
The Format tool will pop up. Click the drop-down menu under File system, and click the preferred one between NTFS and exFAT. Rename the drive under Volume label, if you wish to. If you want the drive to be formatted more thoroughly, uncheck the Quick Format box. Click Start.
Palash Volvoikar / Android Authority
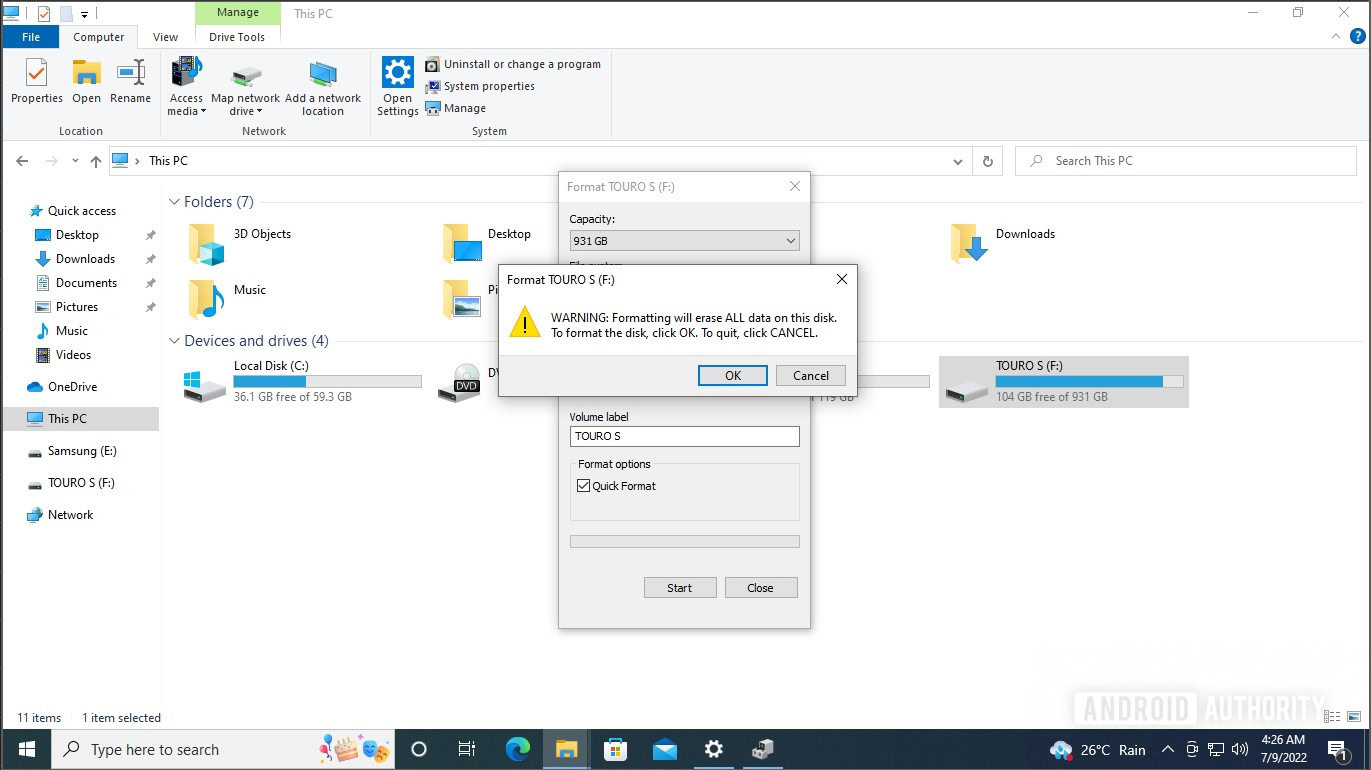
Click OK when the warning pops up.
Palash Volvoikar / Android Authority
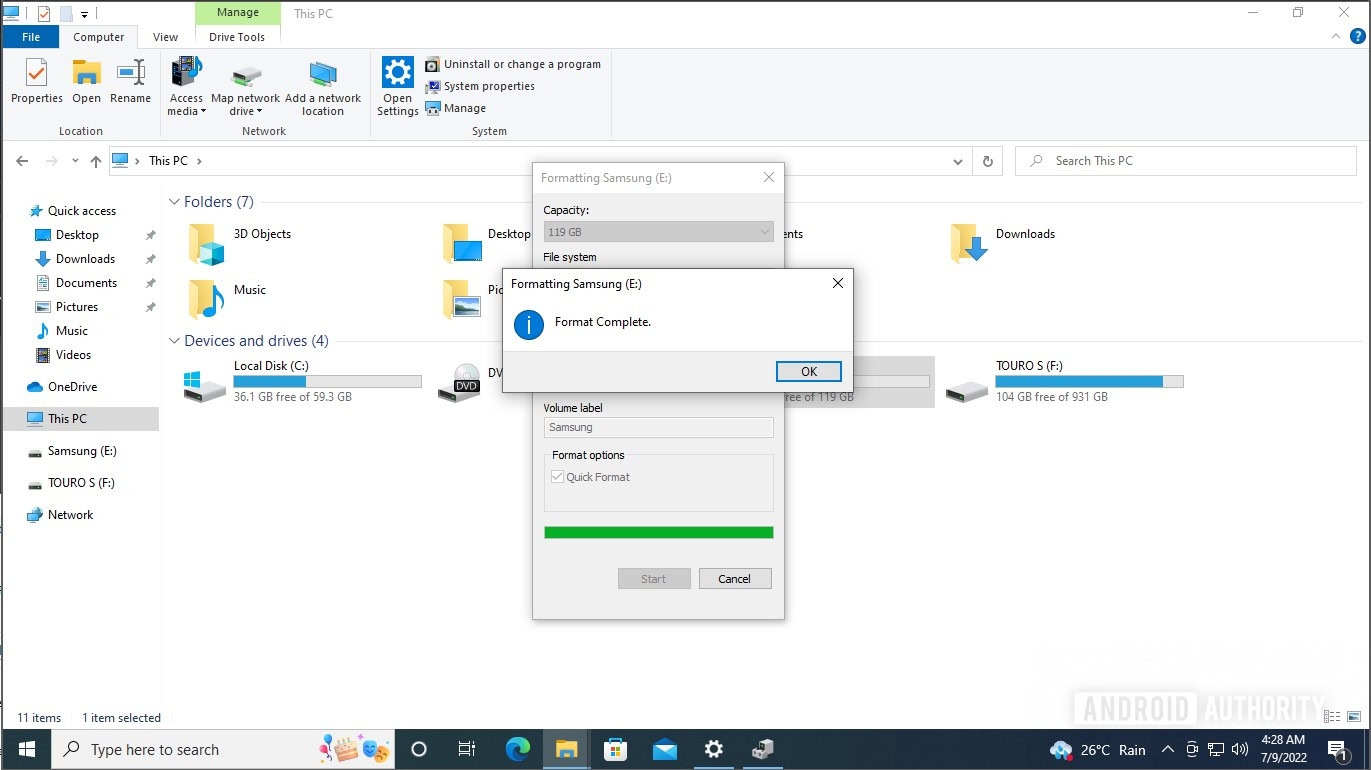
Windows will format your external drive, and give you a confirmation dialog box when the formatting is complete.
Palash Volvoikar / Android Authority
Read more: How to open the task manager in Windows 10 and 11
How to partition an external hard drive on Windows
To partition an external drive on Windows, you’ll need to use the Disk Management tool. Search for Disk Management in Windows search. Click the top search result labeled Create and format hard disk partitions.
Find your external drive listed in the grid view in the bottom half. To create a new partition, you will need unallocated space. You will see this under a black header in the Disk Manager. If you don’t have unallocated space already, and want to partition your external drive, right-click the external drive’s existing partition in the grid view, and click Shrink Volume…
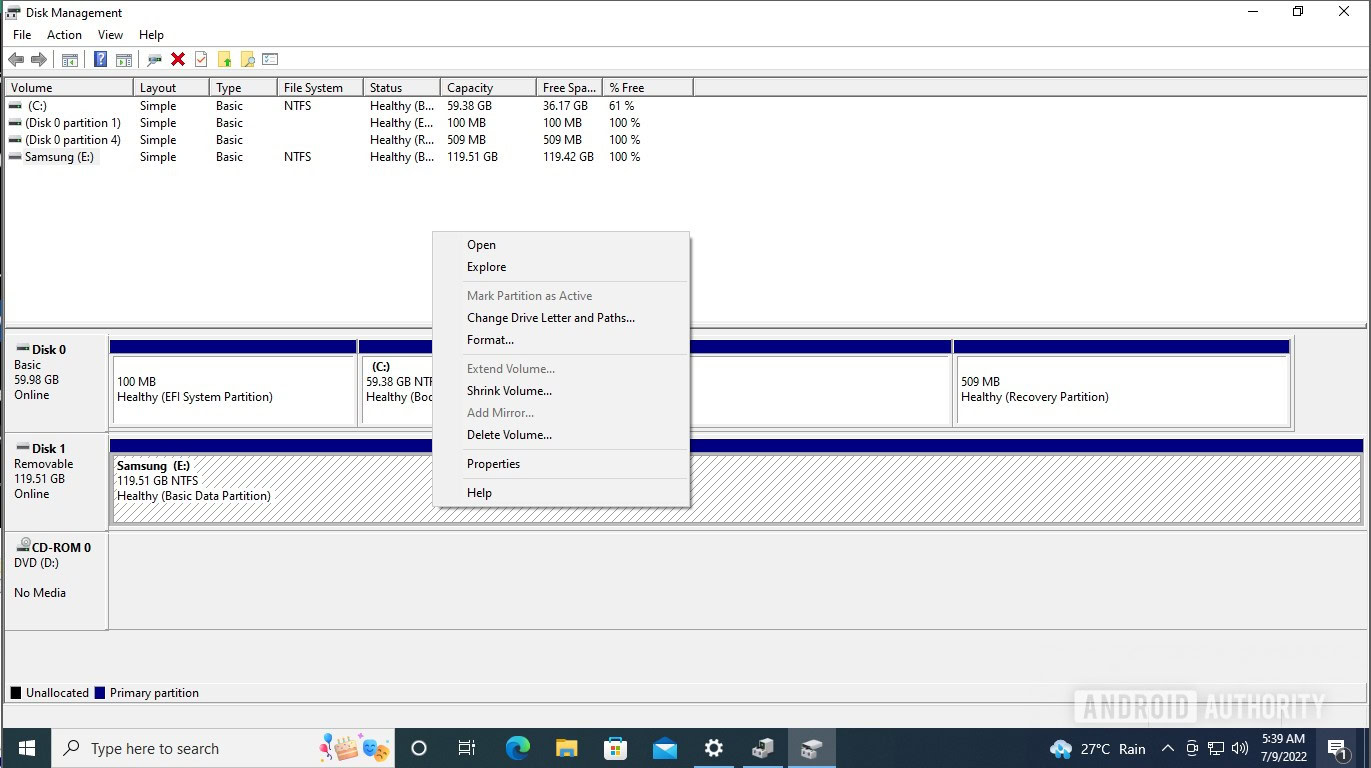
Palash Volvoikar / Android Authority
The Shrink Volume dialog box will pop up. In the box next to Enter the amount of space to Shrink in MB, type in how much space you want for your new partition(s).
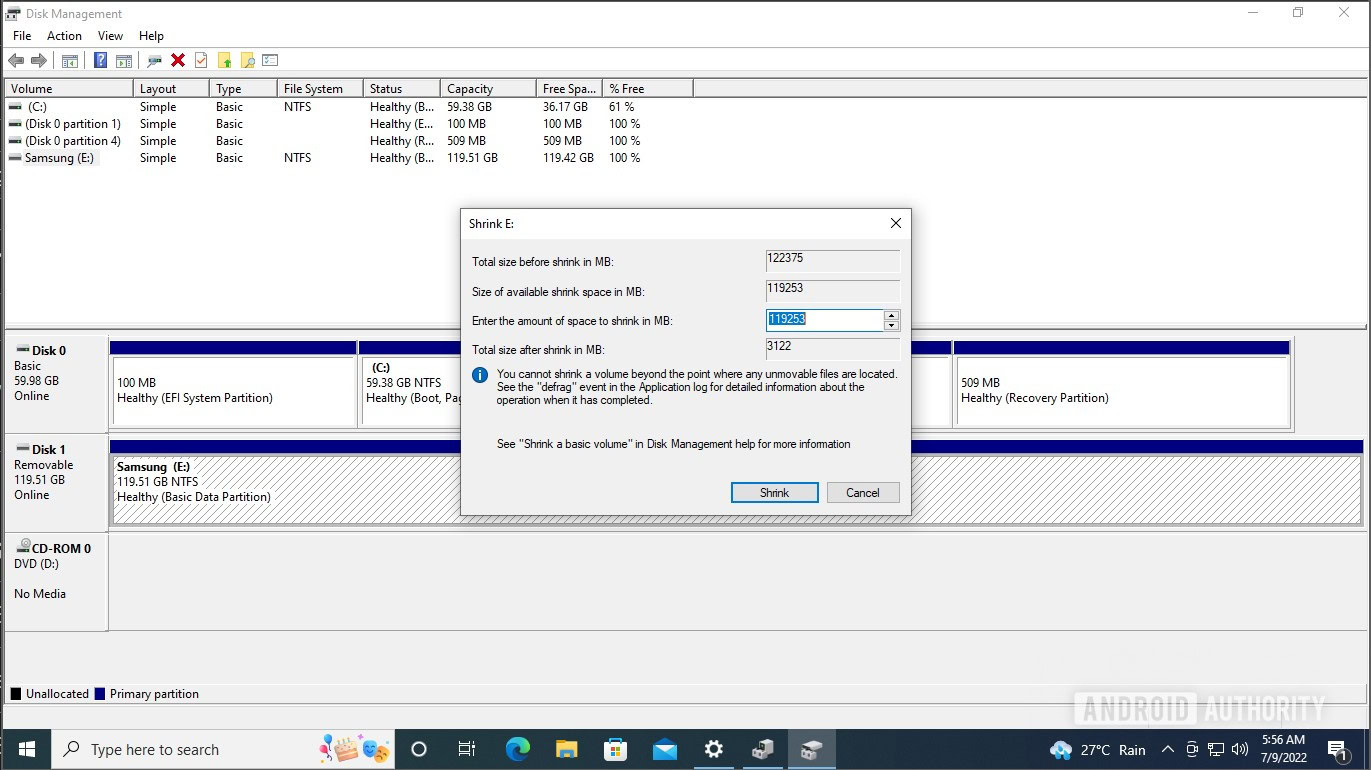
Palash Volvoikar / Android Authority
The default figure here will be the maximum available, but we recommend you leave some breathing room for the current partition. Once you’ve entered the figure, click Shrink.
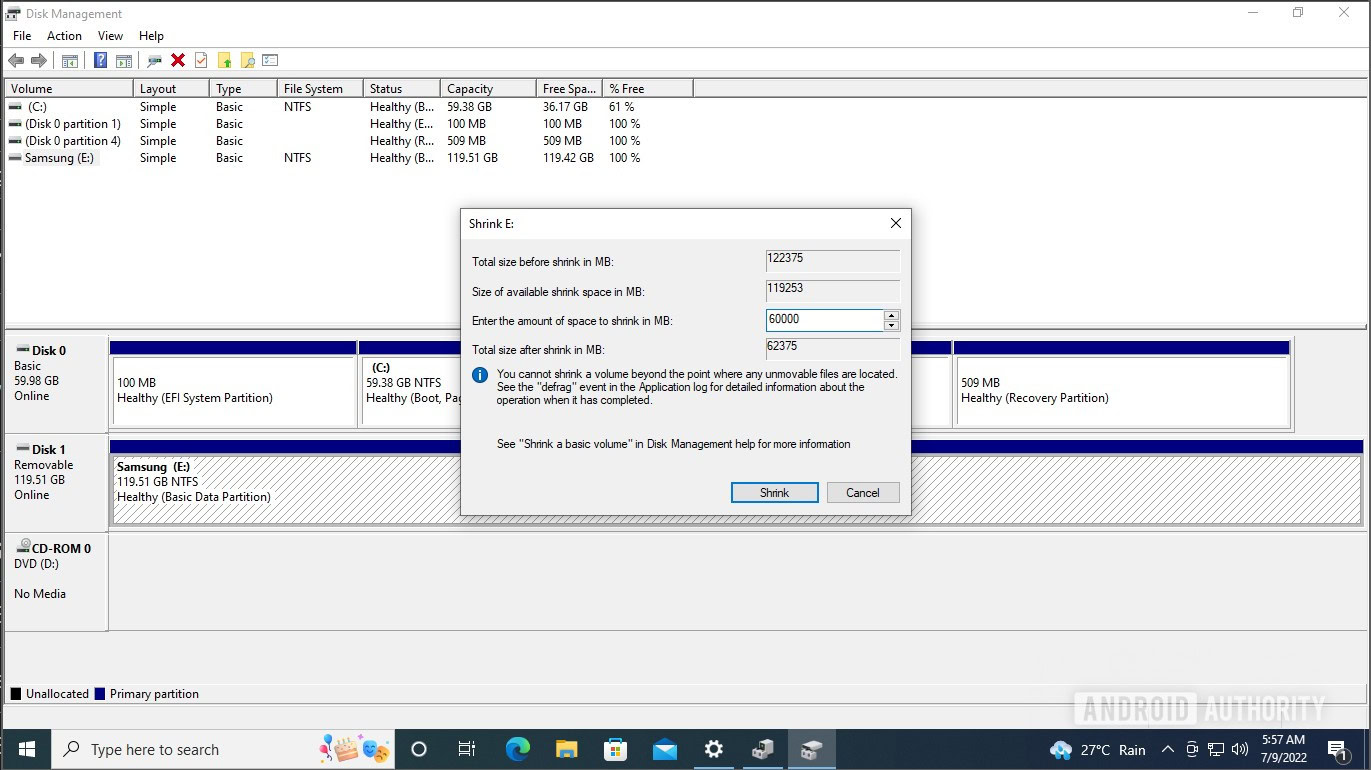
Palash Volvoikar / Android Authority
It’ll take a couple of seconds, and your drive will now show the unallocated space with a black header. Right-click it, and click New Simple Volume.
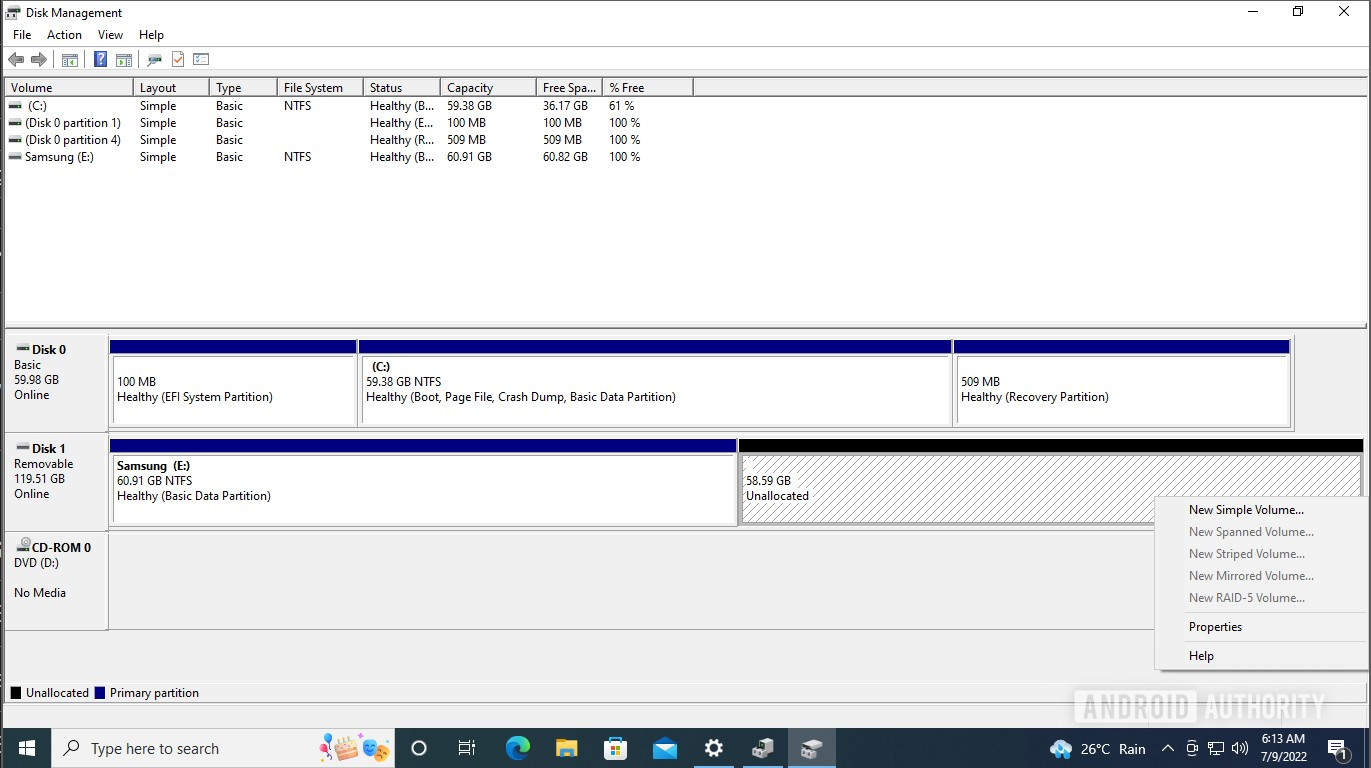
Palash Volvoikar / Android Authority
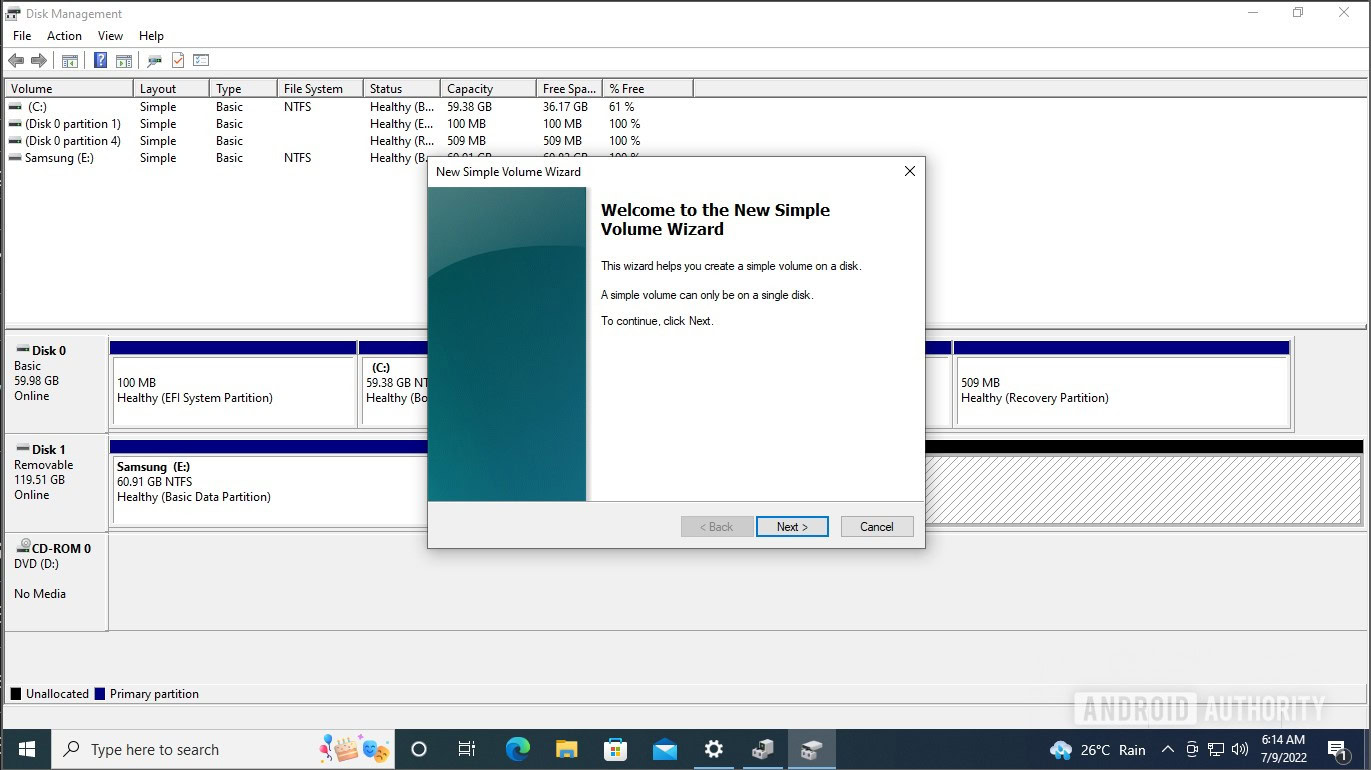
The New Simple Volume Wizard will pop up. Click Next.
Palash Volvoikar / Android Authority
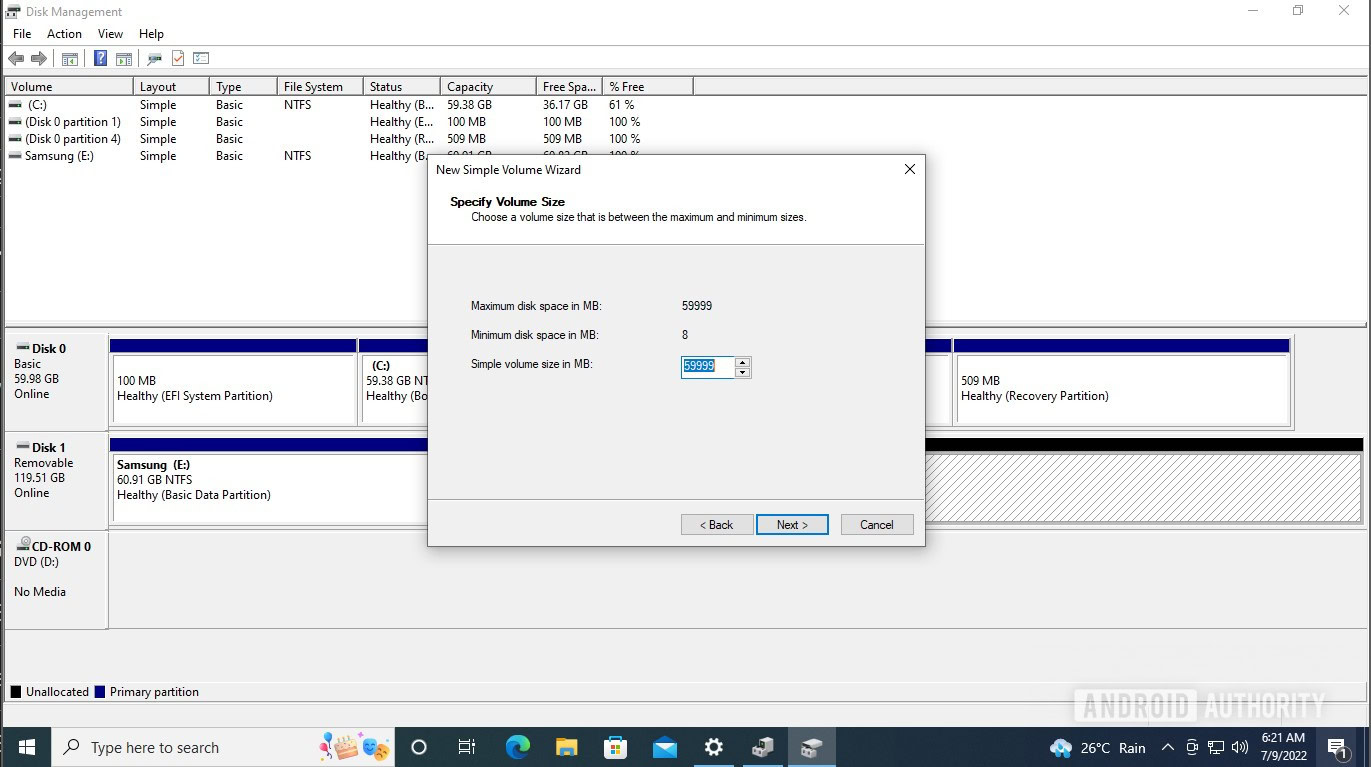
In the box next to Simple volume size in MB, the default figure will be the maximum available space. You can reduce it by typing in a lower figure in the box if you want another partition, or leave it as is if you just want to make one partition, and click Next.
Palash Volvoikar / Android Authority
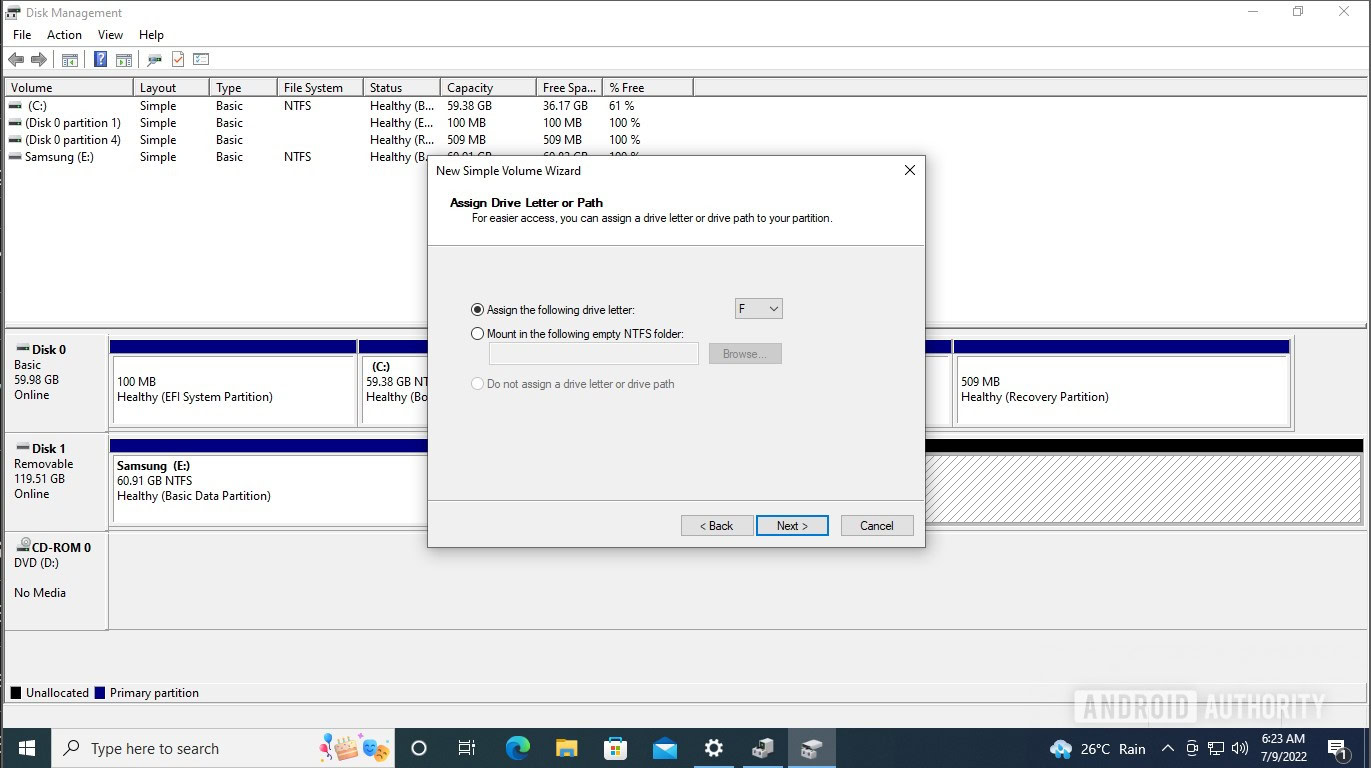
You can assign a different letter on this screen using the drop-down, or just stick to the default one and click Next.
Palash Volvoikar / Android Authority
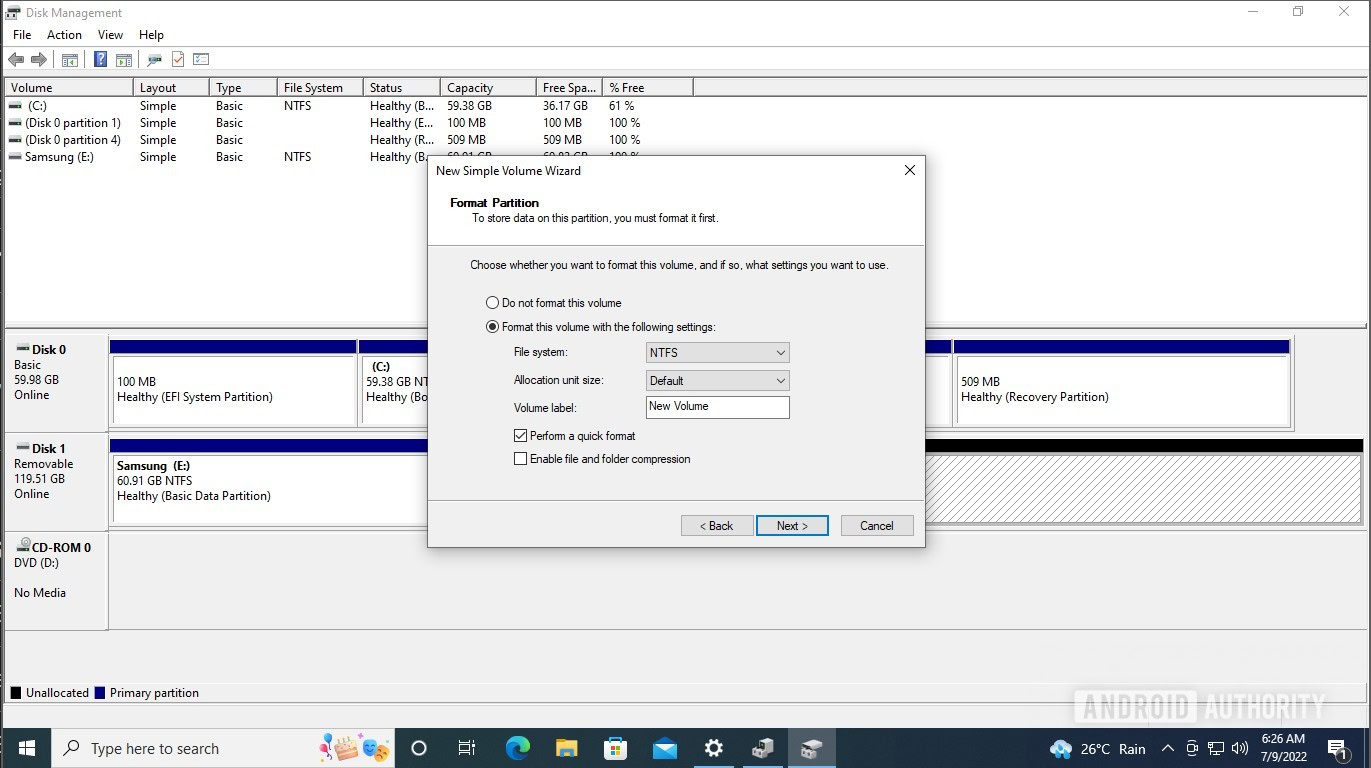
On the next screen, you can choose the file system and name for the partition. Configure it as per your needs, and click Next.
Palash Volvoikar / Android Authority
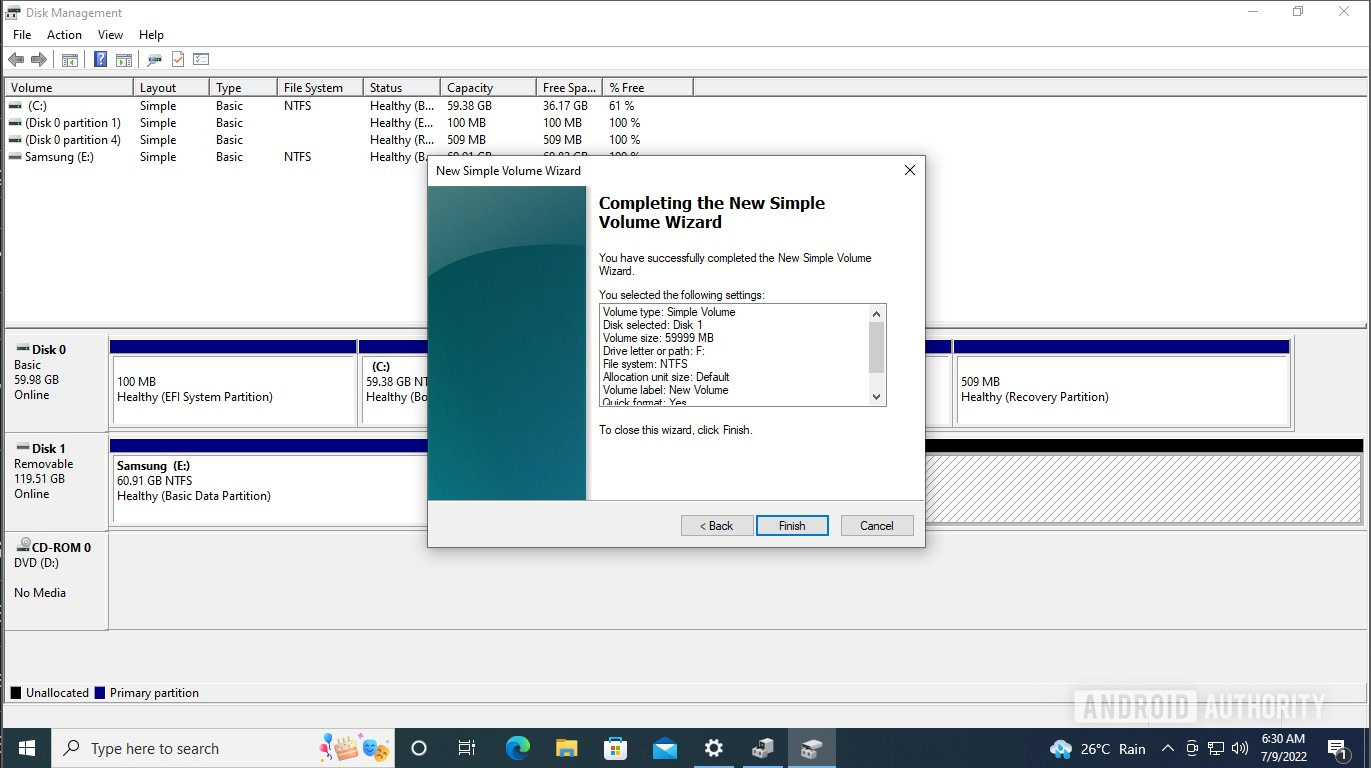
Take a final look, and click Finish to create the new partition.
Palash Volvoikar / Android Authority
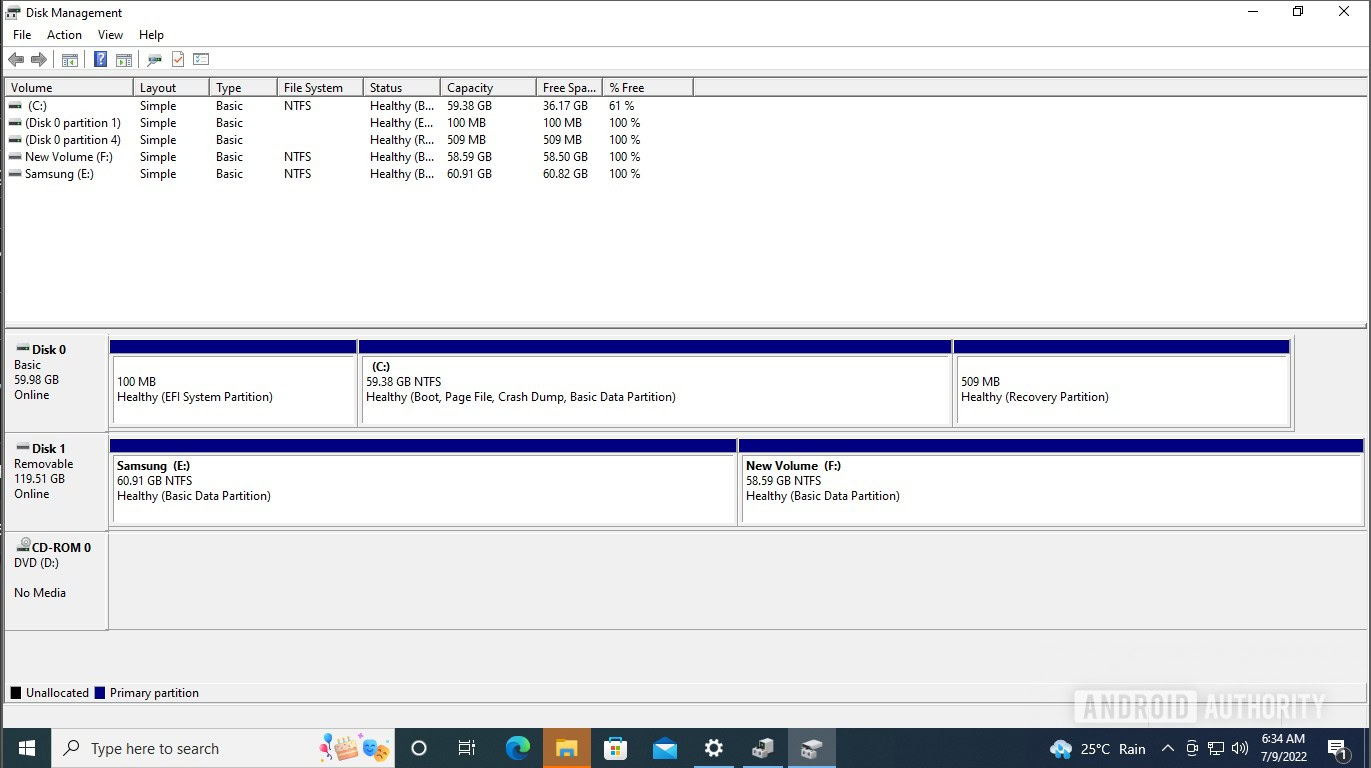
It will take a couple of seconds but the partition will show up in the grid view of your external disk in Disk Manager.
Palash Volvoikar / Android Authority
If you want to create another partition, you can repeat the process to create a new volume with the allocated space you left before, or repeat the whole process by shrinking existing partitions.
Read more: How to install Windows 11
FAQs
There are no downsides to partitioning your external hard disk. It depends upon what kind of usage you want from your external hard disk. It’s good to partition it if you want to use the hard disk for two different purposes and don’t want to mix up your files.
It’s not a necessary thing. It solely depends upon your usage and whether the usage warrants having partitions for different purposes.
Yes, Disk Management in Windows lets you do that. You will need unallocated space available if you want to extend a partition, and if you’re shrinking a partition, it will leave you with unallocated space that you can use to extend other partitions.


