A virtual private network, or VPN, protects you by encrypting your online communications — helping to keep your sensitive information away from prying eyes. But privacy isn’t the only reason to use a VPN.
One of the most popular reasons for using a VPN is to get access to movies and TV shows on streaming services you pay for, like Hulu or Max, while you’re traveling abroad or living in another country. If you create an account for Netflix in the US, for example, the library will vary depending on which country you’re in. And Netflix knows if you’re in another country by using your IP address to determine your location.
So how exactly does a VPN help in this situation?
Well, with a VPN, you can choose a specific server, in another country, changing your IP address to whatever the location is. If you’re in Poland, for example, but want to access the Spain library for Netflix, you can simply choose a server in Spain and you’re good to go.
Unfortunately, not every device you own can use a VPN. Although Apple TV running TVOS 17 can now natively support VPN applications, the options are very limited. If you subscribe to one of the major VPN services, like ProtonVPN or NordVPN, you’re out of luck — unless you use this workaround.
If you’re unfamiliar with Smart DNS, it’s a feature that allows you to access geo-restricted content on devices that don’t typically allow VPNs.
In this guide, we’ll show you how to use the Smart DNS feature in your VPN on your Apple TV. Here’s what you need to know.
For more, here’s how to set up a VPN on your iPhone and the best iPhone VPNs.
1. Access Smart DNS feature in your VPN
You can find tons of VPN services, and while many pretty much do the same thing, advanced features like Smart DNS are only offered on some VPNs. If you’re unfamiliar with Smart DNS, it’s a feature that allows you to access georestricted content on devices that don’t typically allow VPNs or have very limited VPN options.
Before choosing a VPN, make sure that it has a Smart DNS feature, or else you won’t be able to use this method. Popular VPN services like NordVPN, Surfshark and ExpressVPN all have Smart DNS available.
Here’s how to get started: While connected to your Wi-Fi network, go to your web browser on your computer, access the website of your VPN and find the Smart DNS settings. Smart DNS setup will vary from service to service, but essentially you’ll need to activate Smart DNS to produce a Smart DNS address, which you’ll then need to write down.
Note: Make sure you are not connected to your VPN service when setting up Smart DNS.
I used Surfshark VPN to test out this feature, but your steps should be similar.
On Surfshark, go to VPN > Manual setup > TV or console and then hit the Activate Smart DNS button. The website will determine your IP address, and you must the hit Activate Smart DNS again. A few Smart DNS addresses will then be generated for your devices; choose one for your Apple TV.
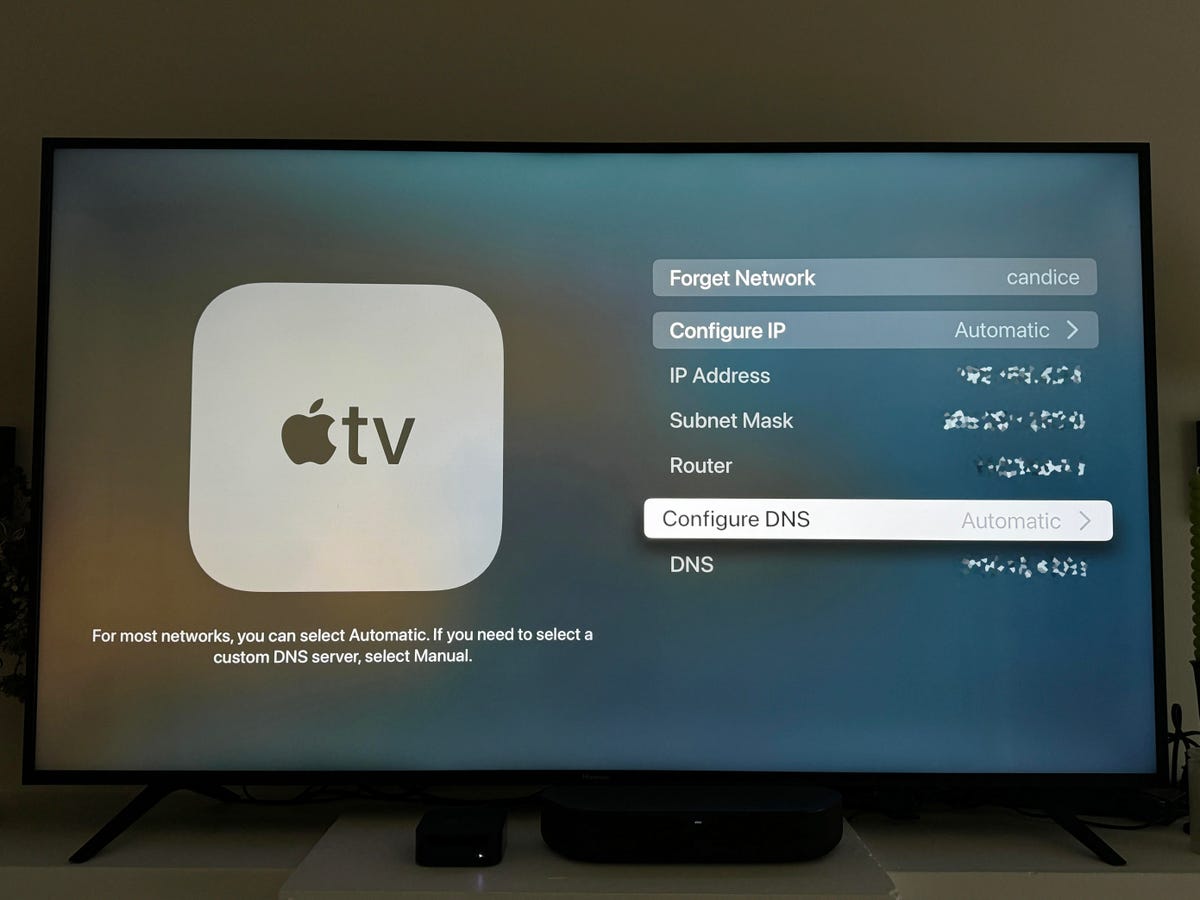
Change the Configure DNS setting from Automatic to Manual.
Once that’s done, your Apple TV should be able to bypass certain georestrictions to give you access to more content libraries in your streaming services.
Unfortunately, you can’t easily change your location like you can with a VPN. A Smart DNS address is locked to one location. Surfshark, for example, only provides Smart DNS addresses that are located in the US, allowing you to access streaming libraries in the US while you’re abroad. If your service provides DNS addresses in other countries, you’ll have to change them in Apple TV each time you want to access a different country’s library. Keep in mind that while VPNs are legal in most places, engaging in illegal activity online is still illegal regardless of whether you’re using a VPN and a Smart DNS feature.
Also, there are two things to note:
- A Smart DNS, unlike a VPN, doesn’t protect your privacy. Instead, it only really changes your location, so be aware. If you want protection, use the regular VPN.
- A Smart DNS may not work with every streaming service. You may get an error that shows you can’t access your service. If so, it’s best to remove the Smart DNS address from your Apple TV.
For more, check out 7 myths about VPNs you should know about and the best cheap VPN services.


