
Edgar Cervantes / Android Authority
Bibliographies are required for just about any research paper ever written, but they can be quite difficult to format. The worst part is trying to create a hanging indent for each source. Luckily, adding them becomes easy and natural once you get the hang of it. Here’s how to do a hanging indent in Google Docs.
Read more: How to add borders in Google Docs
QUICK ANSWER
To do a hanging indent on Google Docs, click View → Show ruler. Highlight the body of text you wish to do a hanging indent for, then click and drag the Left Indent button to the right, as far as you want the indent. Drag the First Line Indent button back to the gray line indicating the page margin.
JUMP TO KEY SECTIONS
How to do a hanging indent on Google Docs (Ruler)
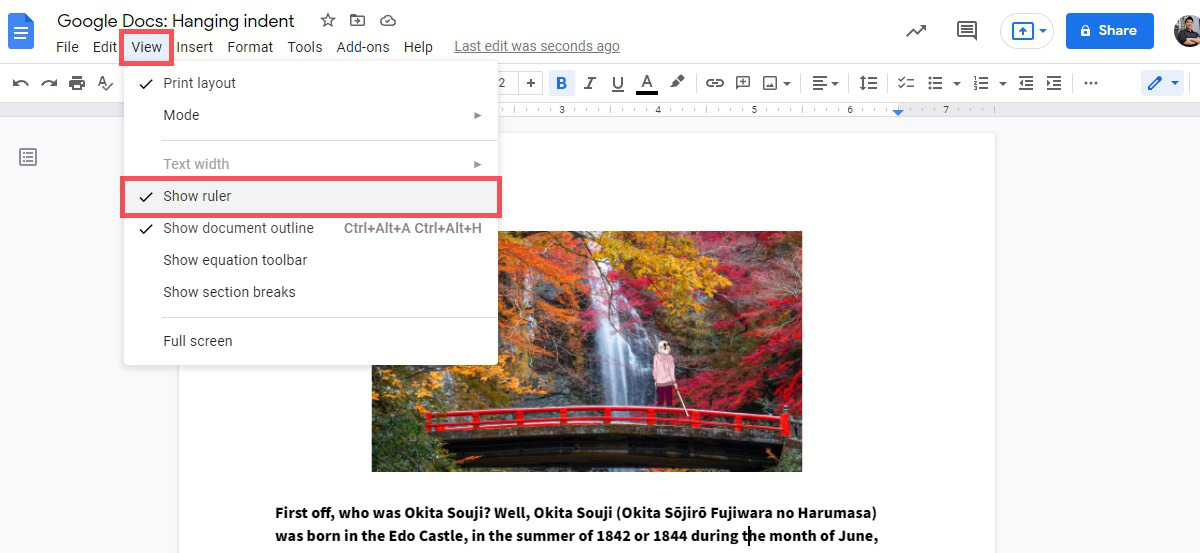
Before you start, make sure your ruler is visible. We’ve shown you how to do this before with changing margins, and it’s a good setting to default. To make the ruler bar visible, click View and make sure there’s a checkmark next to Show ruler.
Curtis Joe / Android Authority
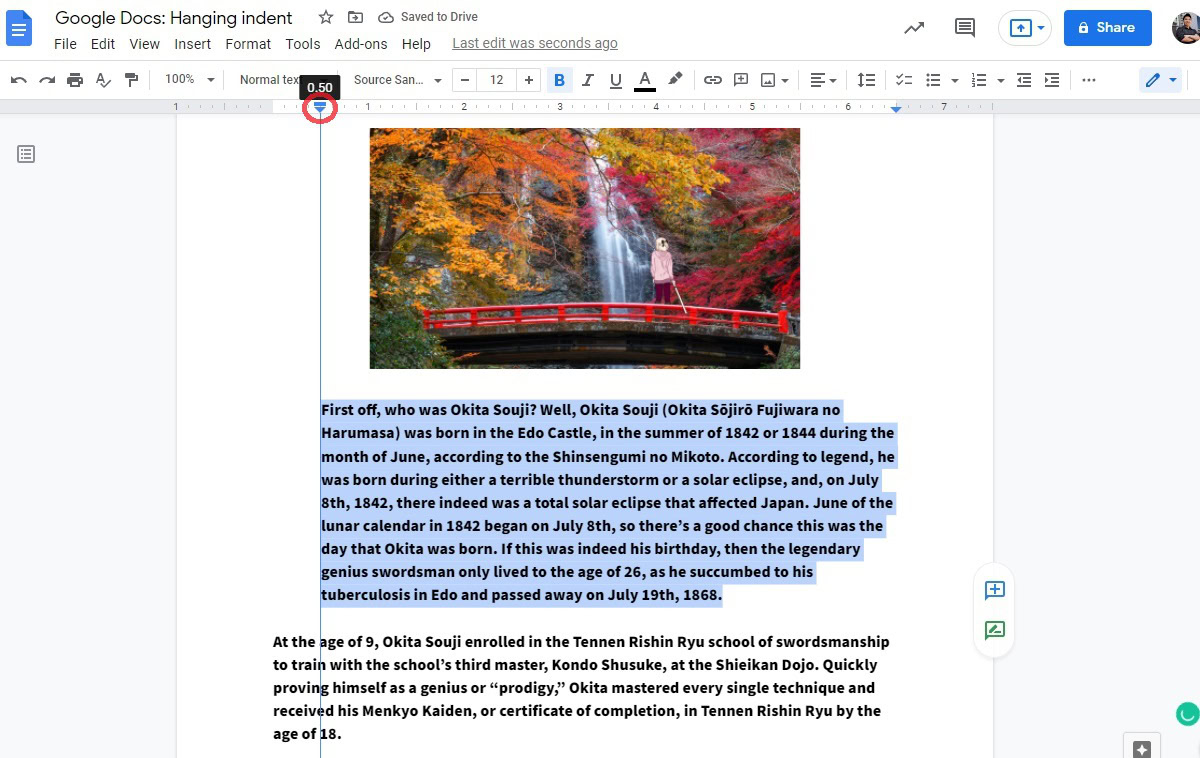
Highlight the text you wish to indent, then click and drag the Left Indent button; this is the small blue arrow on the ruler. In our example, we’re moving it 0.5-inches to the right to make the total margin 1.5-inches.
Curtis Joe / Android Authority
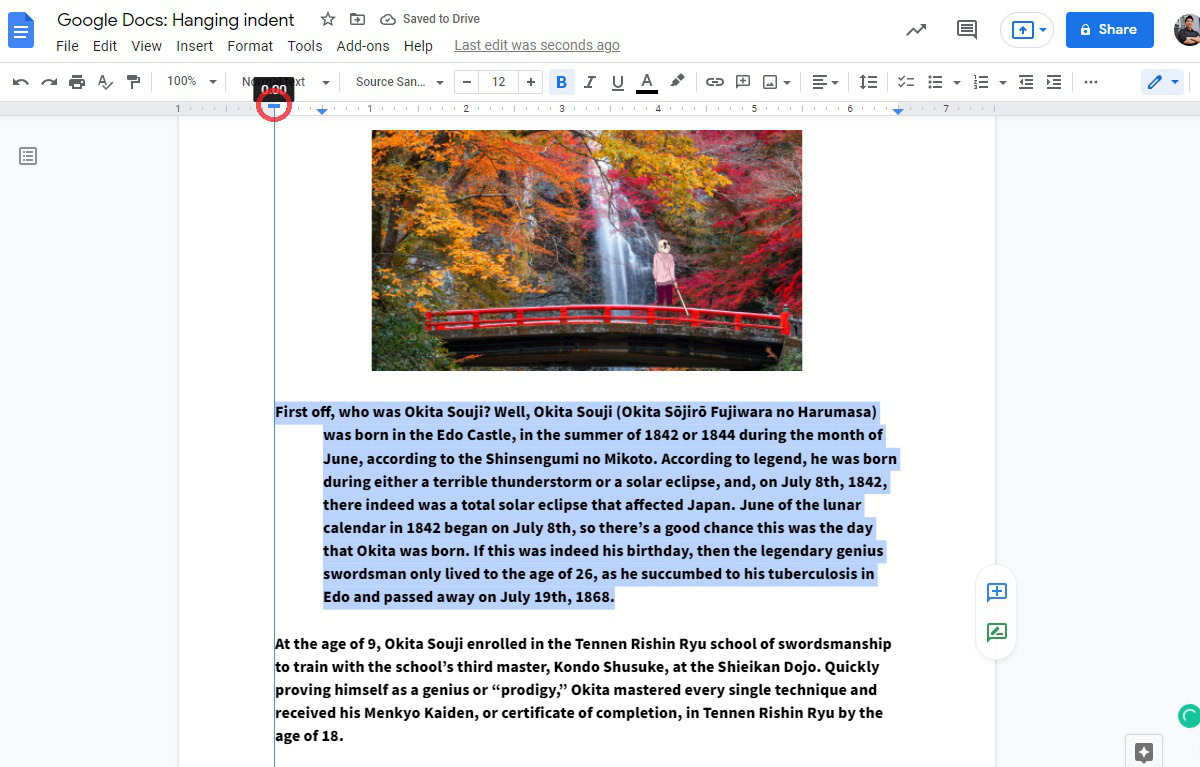
Once you’re happy with the indent, click the First Line Indent button; this is the small blue rectangle above the blue arrow. Drag it back to the gray line indicating the page margin.
Curtis Joe / Android Authority
Repeat the process for everything you need a hanging indent for. It works especially well for things like cited pages in papers. This also works if you need to indent a large quote within a paragraph.
How to do a hanging indent on Google Docs (Indentation options)
There is another way to do a hanging indent in Google Docs. It takes a little bit longer, but it is still pretty easy.
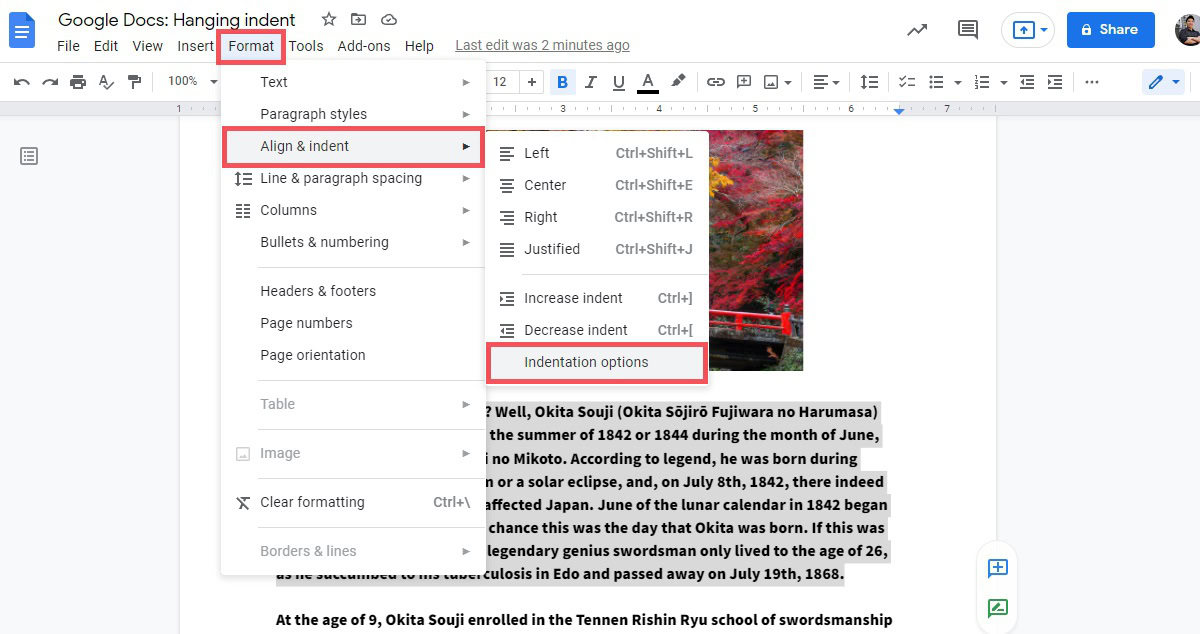
Highlight the text you wish to do a hanging indent for, then click Format. Hover your cursor over Align & indent, then click Indentation options.
Curtis Joe / Android Authority
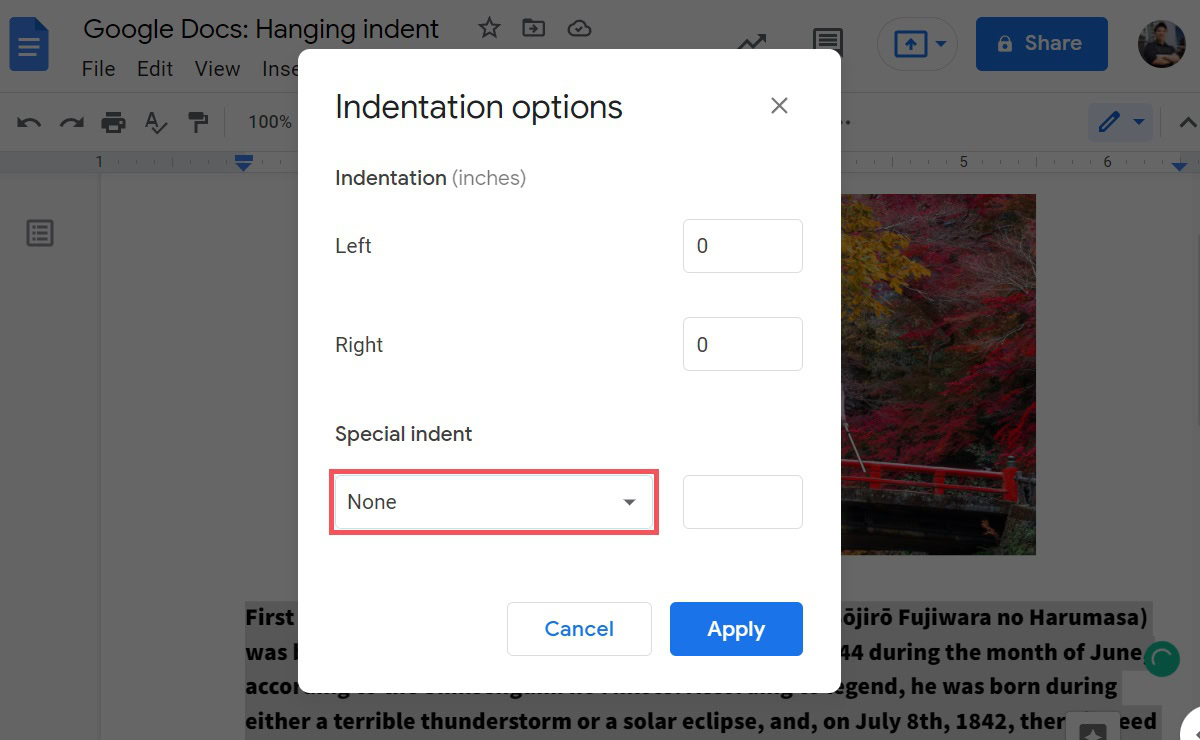
There is a dropdown menu underneath Special indent. Click this.
Curtis Joe / Android Authority
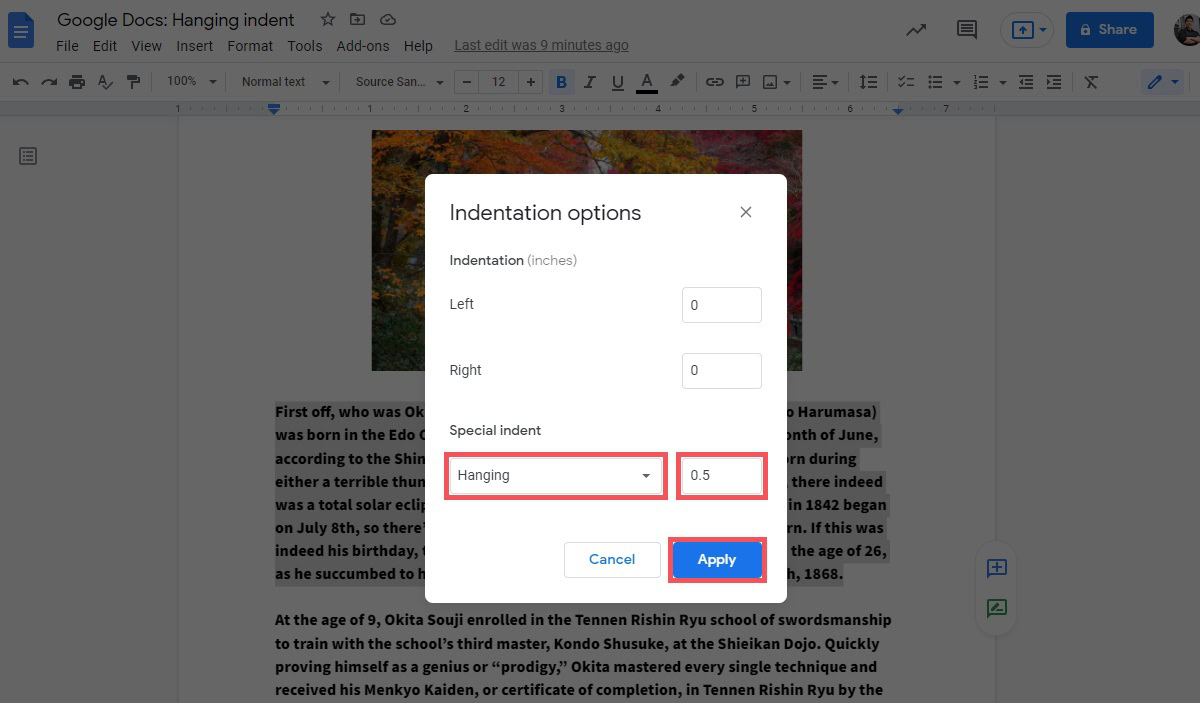
Select Hanging from the dropdown menu. In the field on the right, enter the value for how far over to the right you want the hanging indent to be. In this instance, we are setting it to 0.5 inches. Click the blue Apply button at the bottom when finished.
Curtis Joe / Android Authority
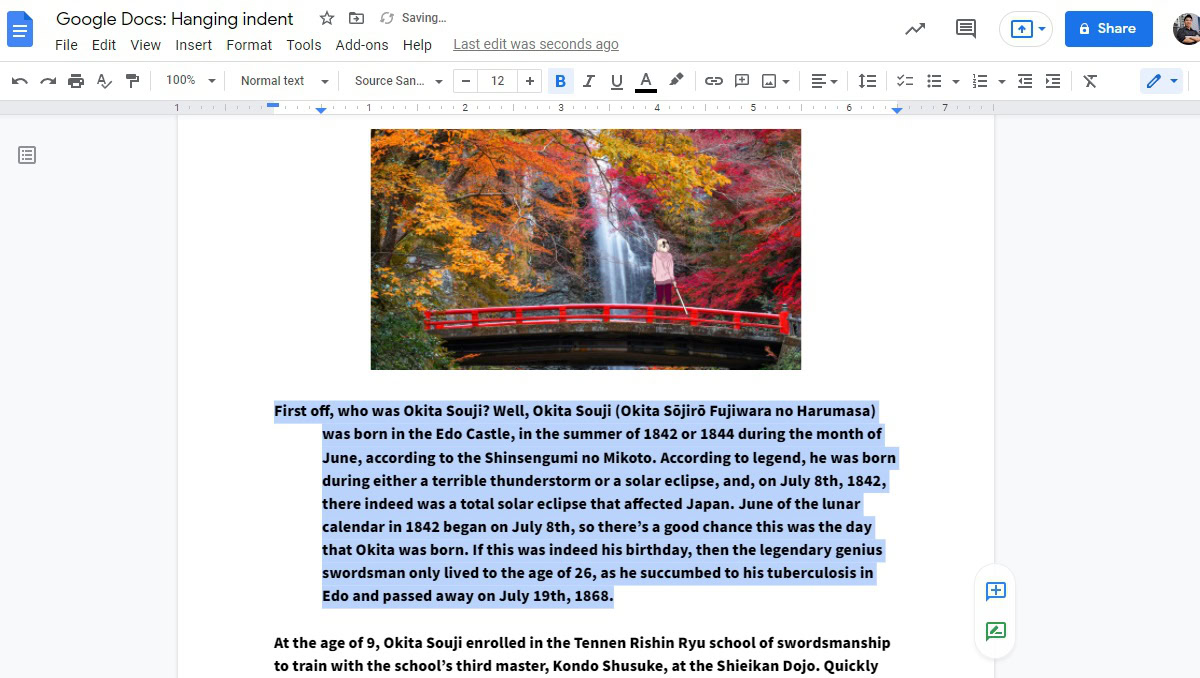
When finished, your hanging indent will be formatted perfectly on the page.
Curtis Joe / Android Authority
How do you do a hanging indent on the Google Docs app?
To do a hanging indent on the Google Docs mobile app, press and drag over the text you want to indent. This will select it. Tap the Format button; this looks like a capital ‘A’ with four horizontal lines to its right. Press the Paragraph tab along the top of the pop-up, then choose the indent type.
Note that this only works for normal kinds of indents, and you will need to play with the lines of your text if you want to do a hanging indent.


